About This Lab
Overview
Welcome to the Nexus Dashboard Fabric Controller (NDFC) demonstration. This guide will walk you through using NDFC in various contexts, including:
- Greenfield Provisioning:
- Learn how to provision new VXLAN EVPN fabrics and import and deploy Nexus 9000 devices on Greenfield Fabrics.
- Discover how to define interface policies, create new vPC Port-Channels, and extend internal connectivity to external fabrics and routing domains.
- Brownfield Importing: Understand how to import an existing VXLAN BGP EVPN fabric into Cisco NDFC, a beneficial feature for those who have created a VXLAN BGP EVPN fabric through traditional methods and wish to manage it with NDFC.
- ISN Fabric Deployment: Import and deploy the ISN Fabric for underlay, overlay control-plane, and data-plane functions.
- Multi-Site Configuration: Manage multiple VXLAN BGP EVPN member fabrics through a single multifabric container, an essential control point for overlay networks and Virtual Routing and Forwarding (VRF) attached to all child fabrics.
- Endpoint Locator Configuration: Use the Endpoint Locator (EPL) feature for real-time tracking of data center endpoints, including tracing network life history and gaining insights into endpoint trends.
- Network and VRF Importing: Import networks and VRFs from an external database (Netbox in this case), showcasing the power of NDFC API's programmability capabilities.
- Change Control and Rollback functionalities: Discover the functionalities introduced in NDFC 12.1.3b, including the association of users to different roles (stager, approver, deployer) and the defined process required for changes to be pushed into devices.
Learning Objectives
By now, the proctors should have introduced you to the Nexus Dashboard Fabric Controller and the Nexus 9000 VXLAN BGP EVPN Multi-Site Architecture. Now, it's time to put theory into practice and follow this lab guide. If you have any queries or issues, don't hesitate to ask for assistance.
Disclaimer
This lab design and its configuration examples could serve as a reference. For production design-related inquiries, please contact your Cisco representative or a Cisco partner.
Reserve Your Session
Cisco Account Required
To reserve your lab session, you'll need to log in with your Cisco.com credentials. If you don't have a Cisco Account, contact the proctors for manual session mapping to your workstation.
First, Sign-in to Cisco Website using your personal account. Then click on this link to log into the portal and associate your account with a dCloud session.
In case you do not see any topologies
Then, access your dCloud Sessions. If your session isn't ready for use, please notify the proctor. Once ready, click on the green "View" button to start your lab session.
Lab Access
After clicking the "View" button, you should see the topology representing the different devices in this lab.
Info
This is referred to as the dCloud frontend topology
Don't be surprised if you don't see any Nexus devices there. Instead, you'll see servers and workstations. This is because for the VXLAN EVPN Fabrics, we use Virtual Nexus 9000 switches running on top of the CML (Cisco Modeling Labs) Simulator. The displayed topology is the LAB Frontend, providing access to different jump hosts.
Access to the CML itself should not be necessary, as all devices will be reachable over the management 0 interface. MPutty sessions are configured in the Windows Jump Host. This lab has two jump hosts:
- wkst1: A Windows device used for most tasks, including browser access to NDFC and MPutty access to all Nexus and servers used to generate traffic inside the topology.
- Ubuntu-Desktop: A secondary Ubuntu VM used to trigger an Ansible playbook for automating synchronization between an IPAM and NDFC.
Danger
Consult with the proctor before rebooting VMs
Option 1 - dCloud WEB-RDP
Tip
We recommend this option as it contains all the links and SSH sessions needed to reach all the lab's devices.
To access, click on the wkst1 icon in your dCloud frontend topology, select Remote Access from the new menu, then click on WebRDP.
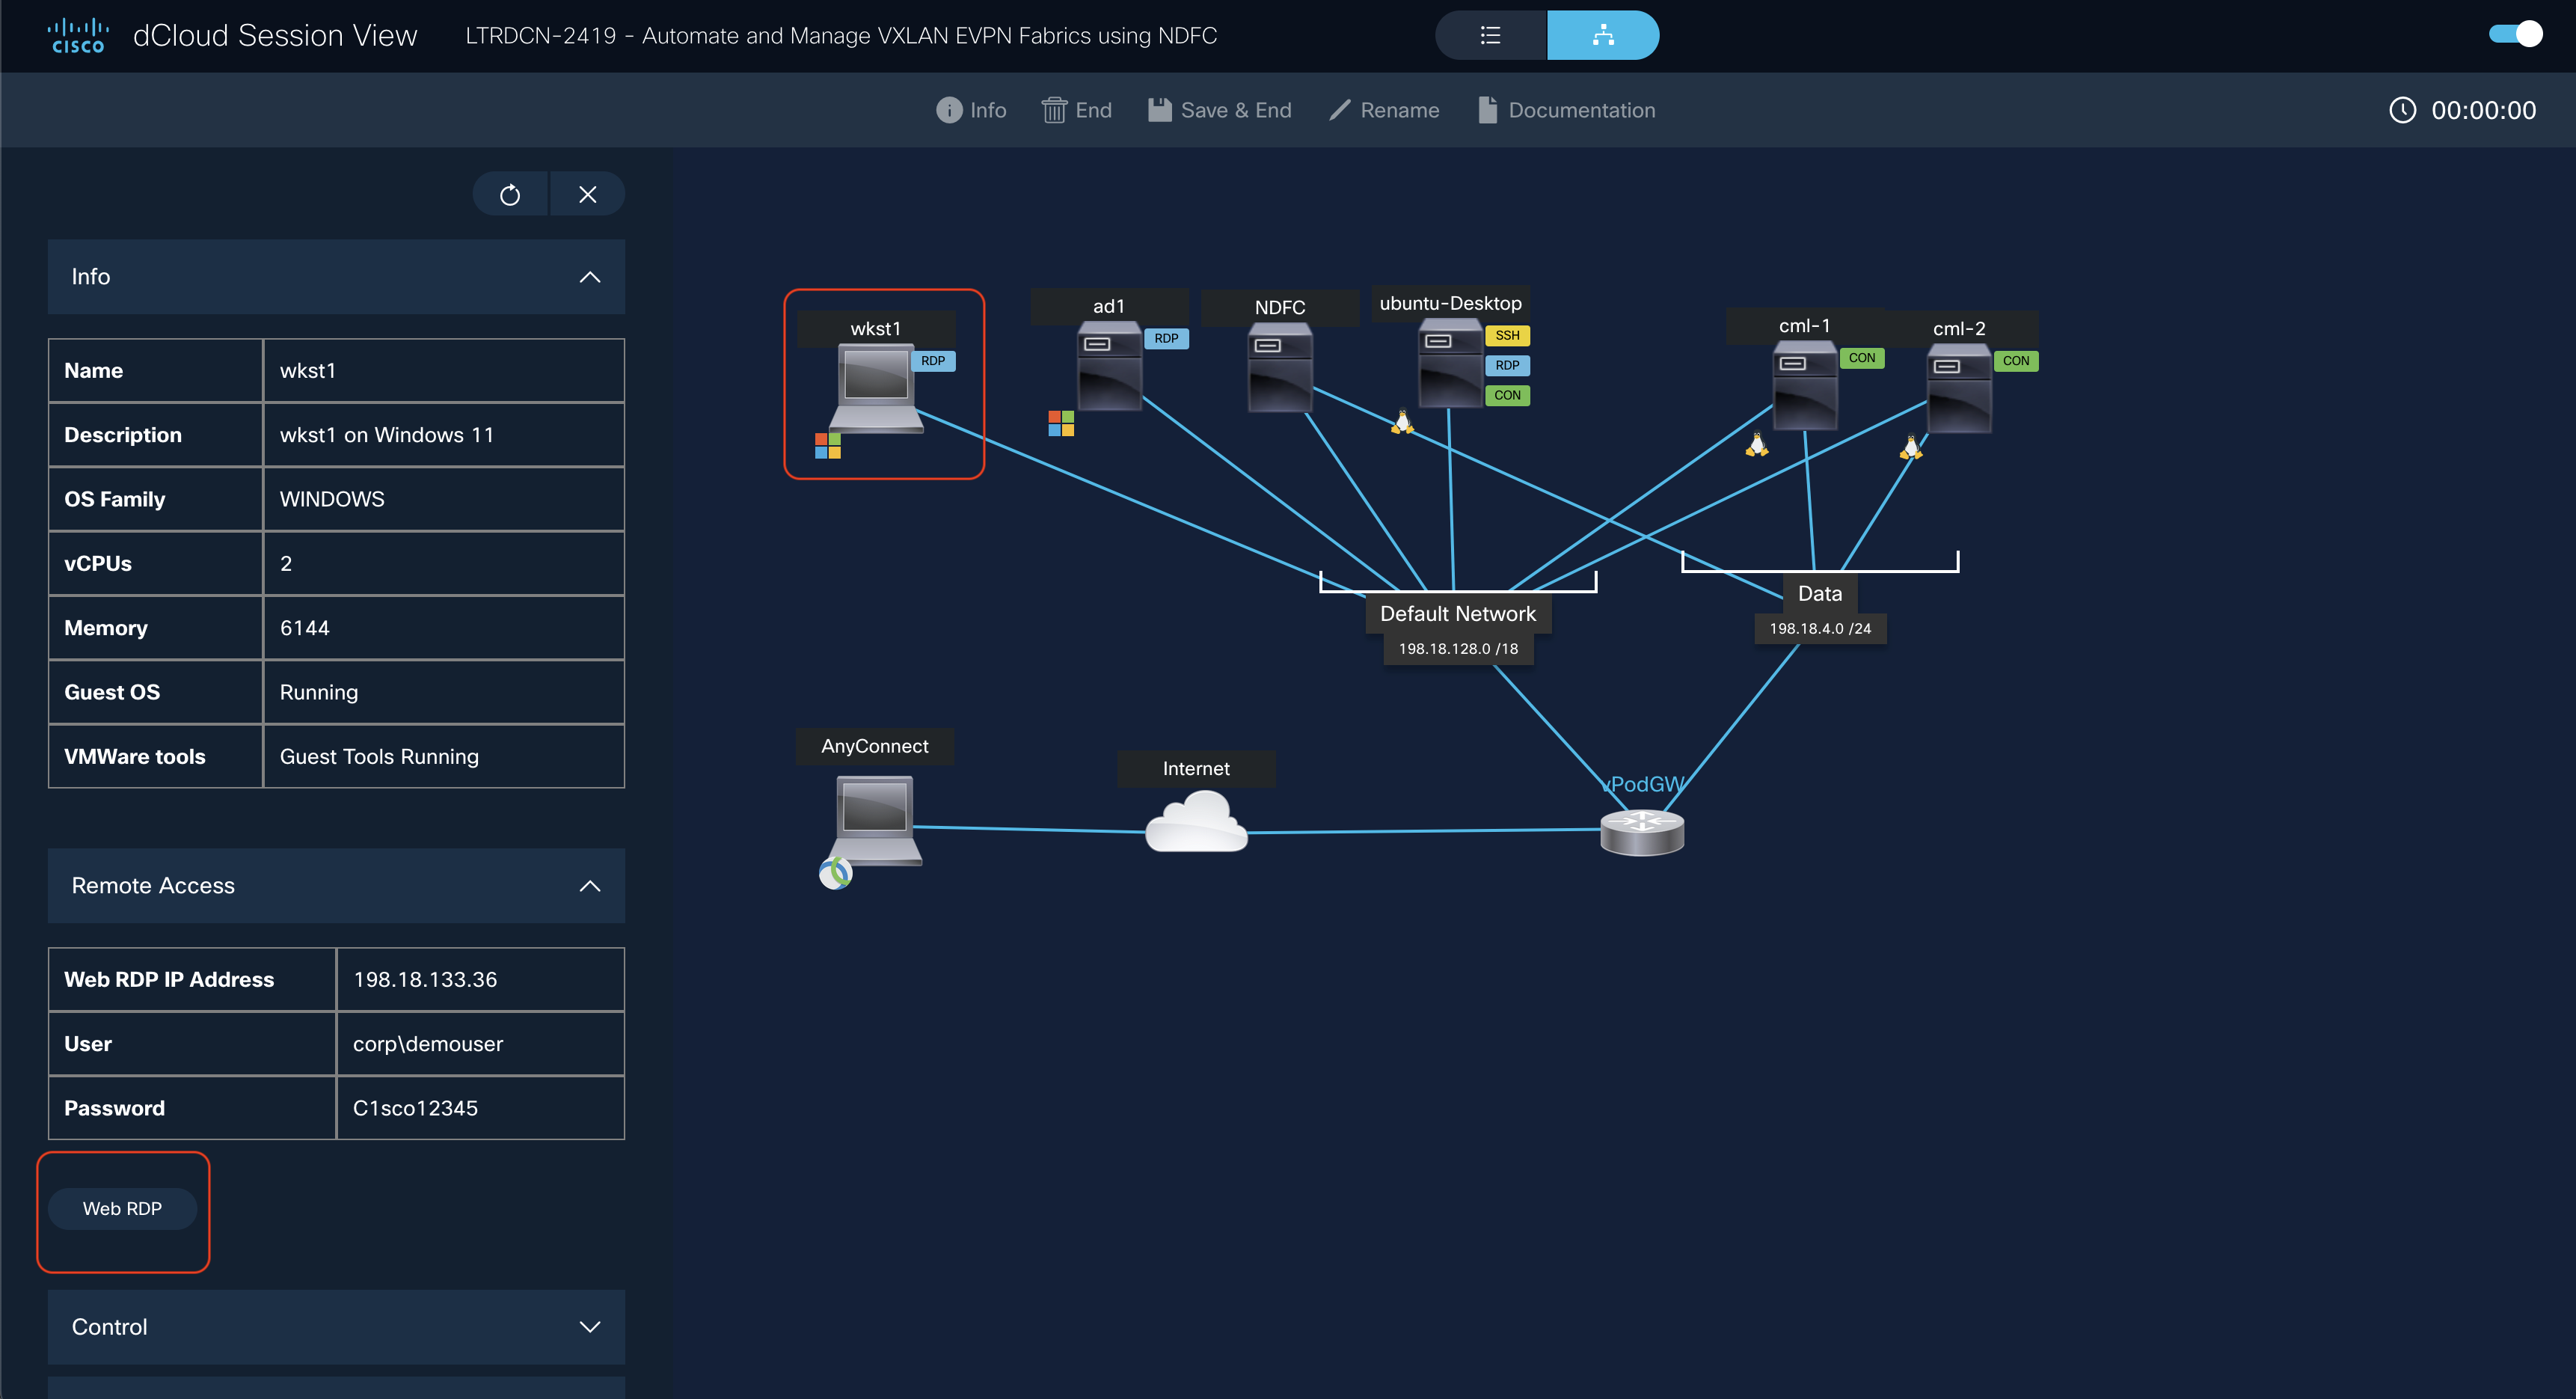
This action will open a new tab providing you RDP access to the WKS machine, which has all URL links and SSH sessions pre-configured.
Option 2 - AnyConnect VPN
Find the AnyConnect Credentials section in the Info button menu in your dCloud frontend topology. Use these credentials with the AnyConnect client installed on your PC.

Once logged into the VPN, you'll be able to access all the dCloud topology resources directly from your PC. All management addresses for the devices can be found in the topology section.