Task 6 - Endpoint Locator
Overview
- This step guides you through enabling the Endpoint Locator (EPL) feature in NDFC, which helps track endpoints connected to the fabric.
- EPL is very useful for troubleshooting or locating specific end-host endpoints within your data center, providing real-time tracking of endpoints, tracing their lifecycle, and offering insights into endpoint additions, removals, and moves.
- NDFC’s EPL feature relies on a BGP peering between NDFC and the Route Reflector of the VXLAN fabric. After the BGP session is established, NDFC receives EVPN BGP updates containing endpoint information.
- For EPL to function, NDFC’s Data interface needs connectivity to the fabric’s Routing Loopback (Loopback0).
- In this lab, NDFC’s Data interface is in the subnet `198.18.4.0/24` and connected to Ethernet 1/5 of Site1-Leaf2.
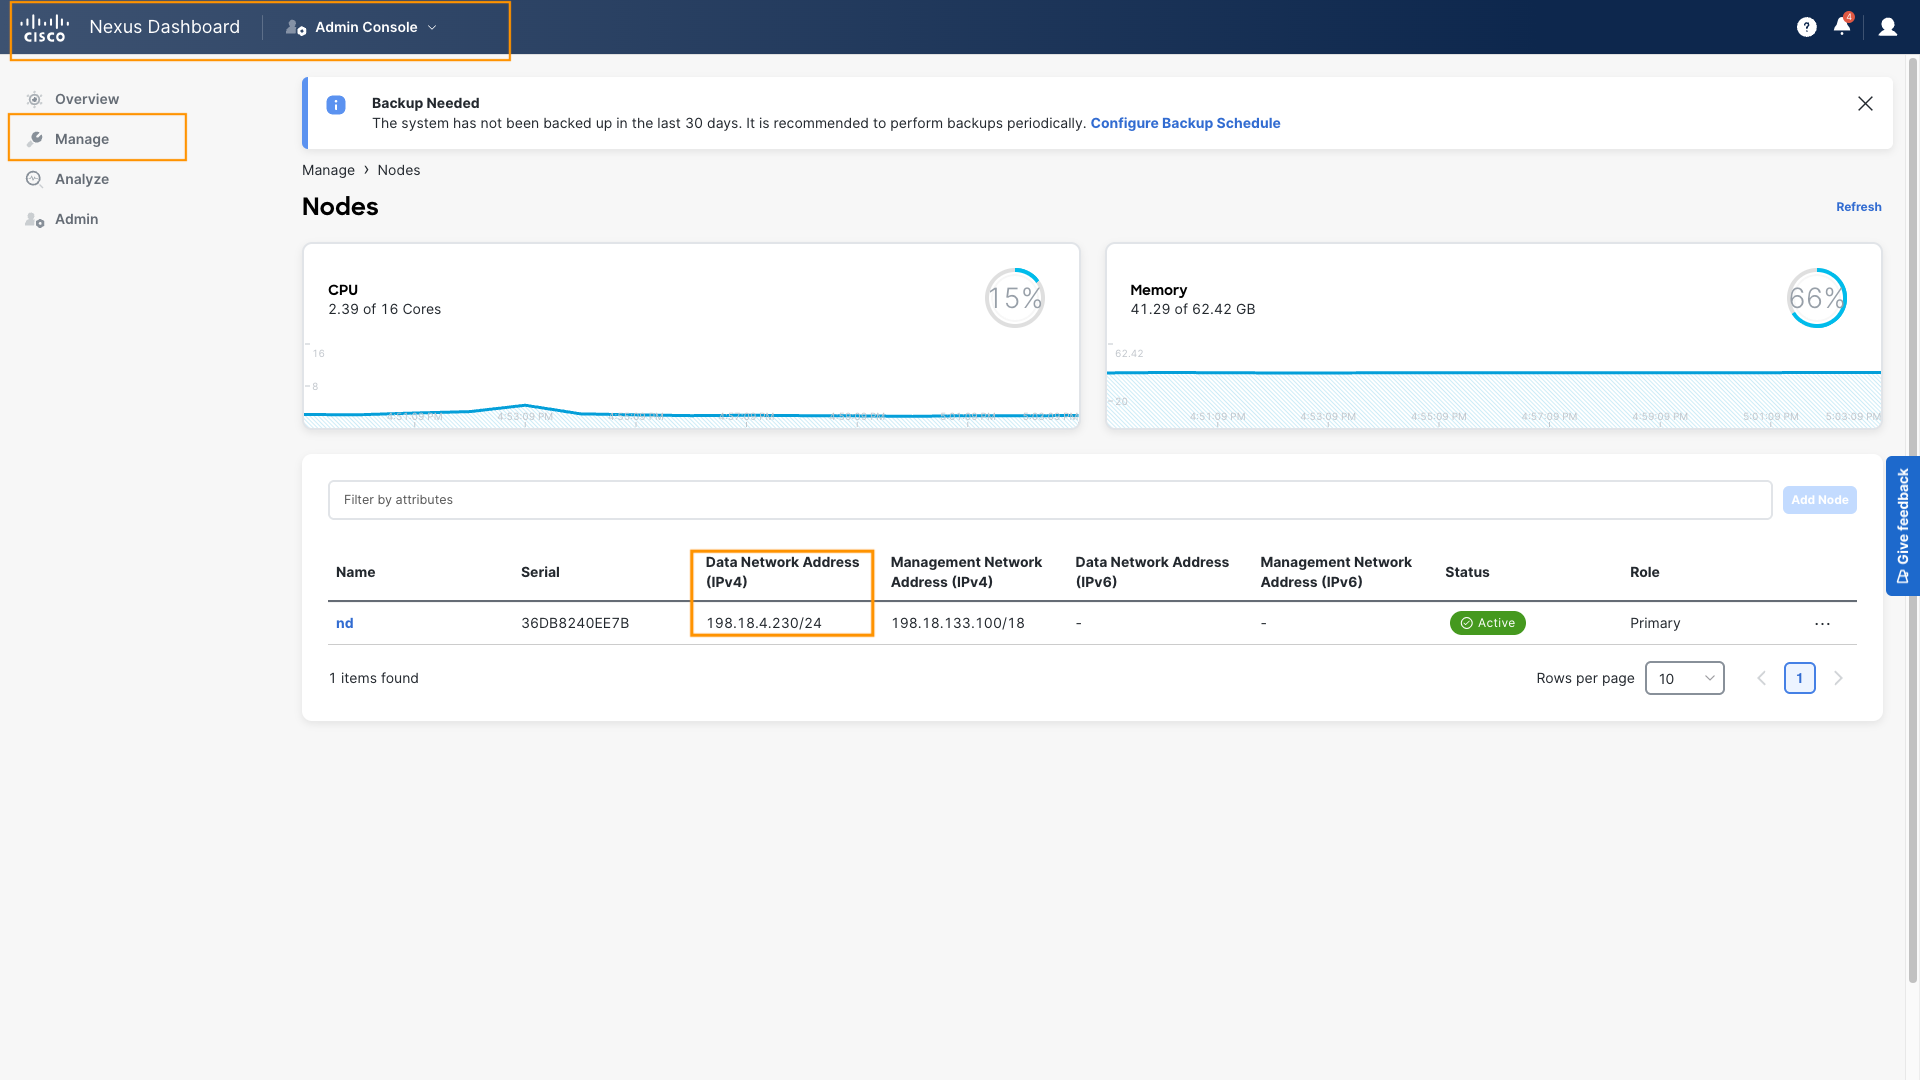
Step 2: (Optional) Verify Data Interface IP for ND
- Click on Nexus Dashboard (top-left corner).
- Go to Manage > Nodes.
-
Observe NDFC Data Interface IP Address
Info
The BGP session source IP always comes from one of the Service Pool IPs dedicated to services/containers that must maintain the same address. These IPs must be configured in the Nexus Dashboard Admin Console, System Settings.
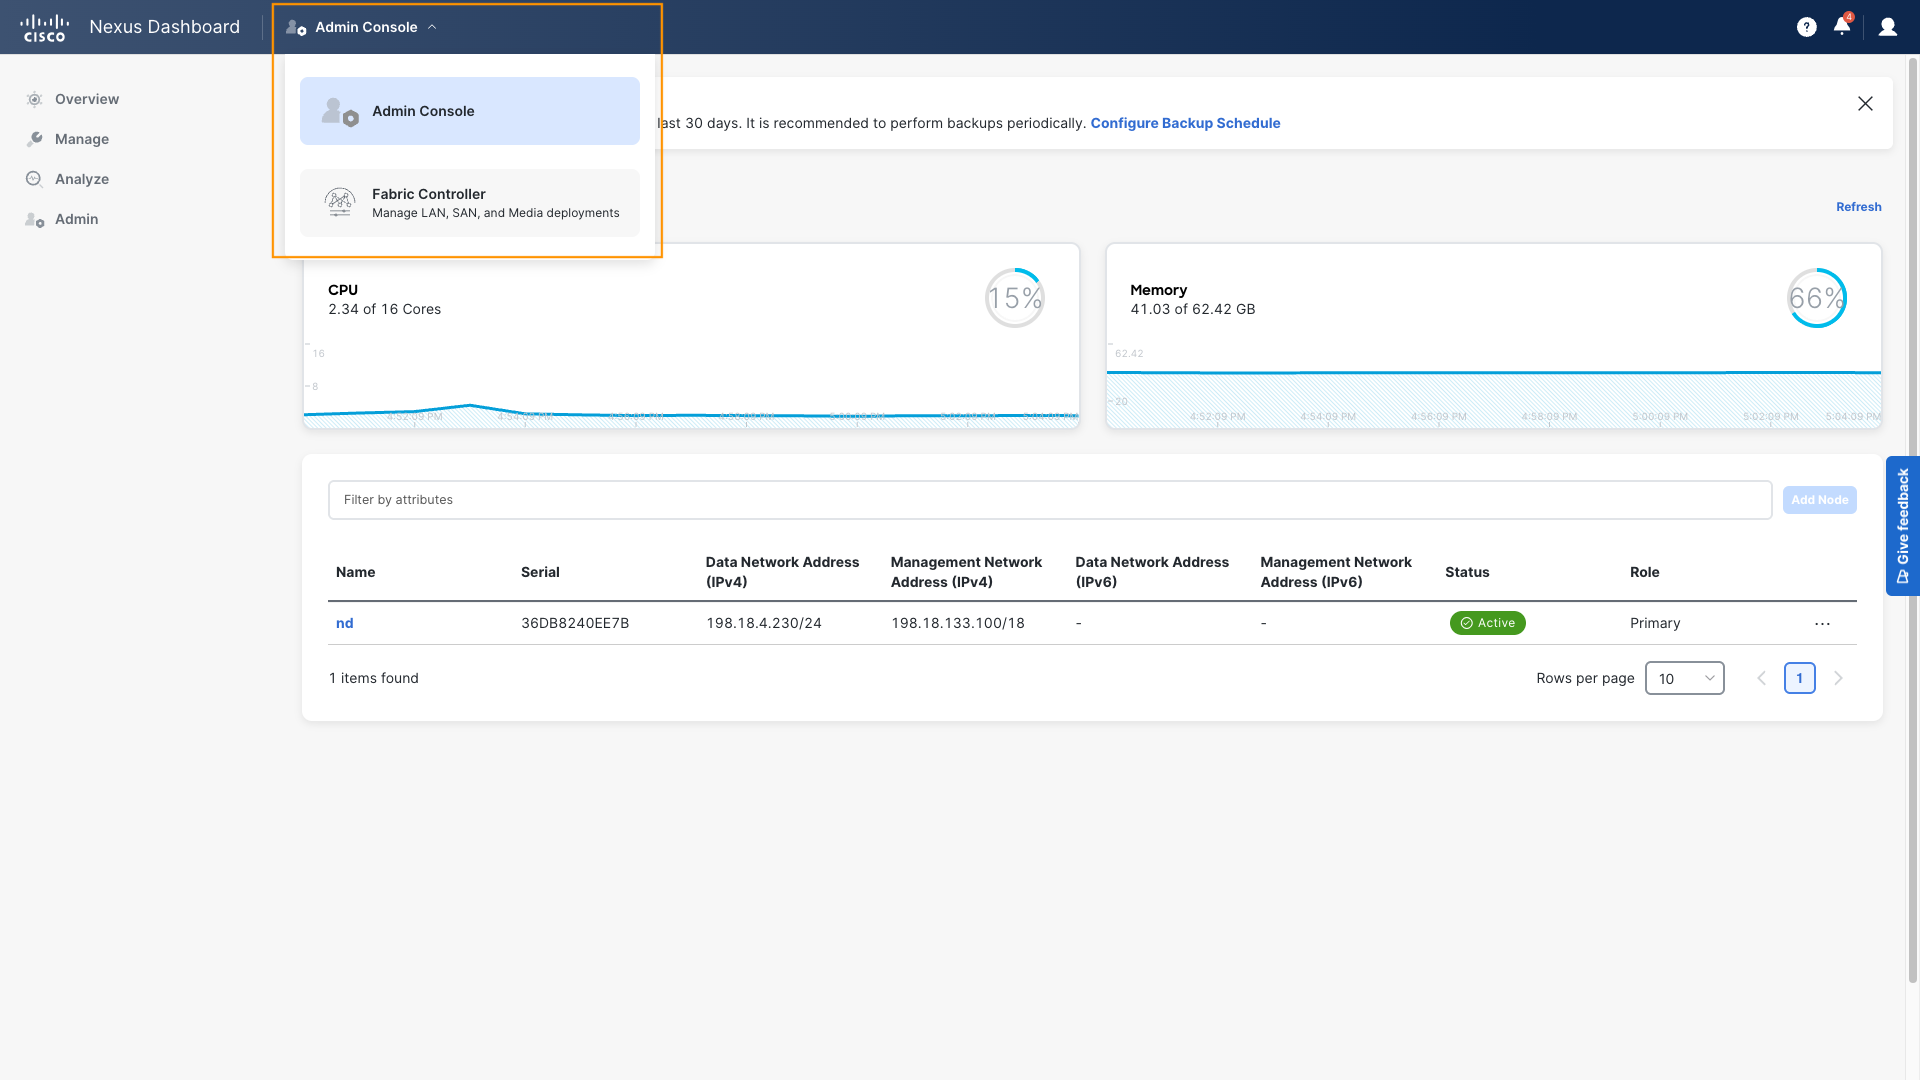
Step 3: Transition from the ND Admin Console to NDFC
- From the ND Admin Console, click Nexus Dashboard in the top-left corner.
-
Select Fabric Controller, which takes you to the NDFC application.
Step 4: Navigate to Fabric
- In NDFC, click Manage > Fabrics.
- Double-click on Site1-Greenfield to open the fabric.
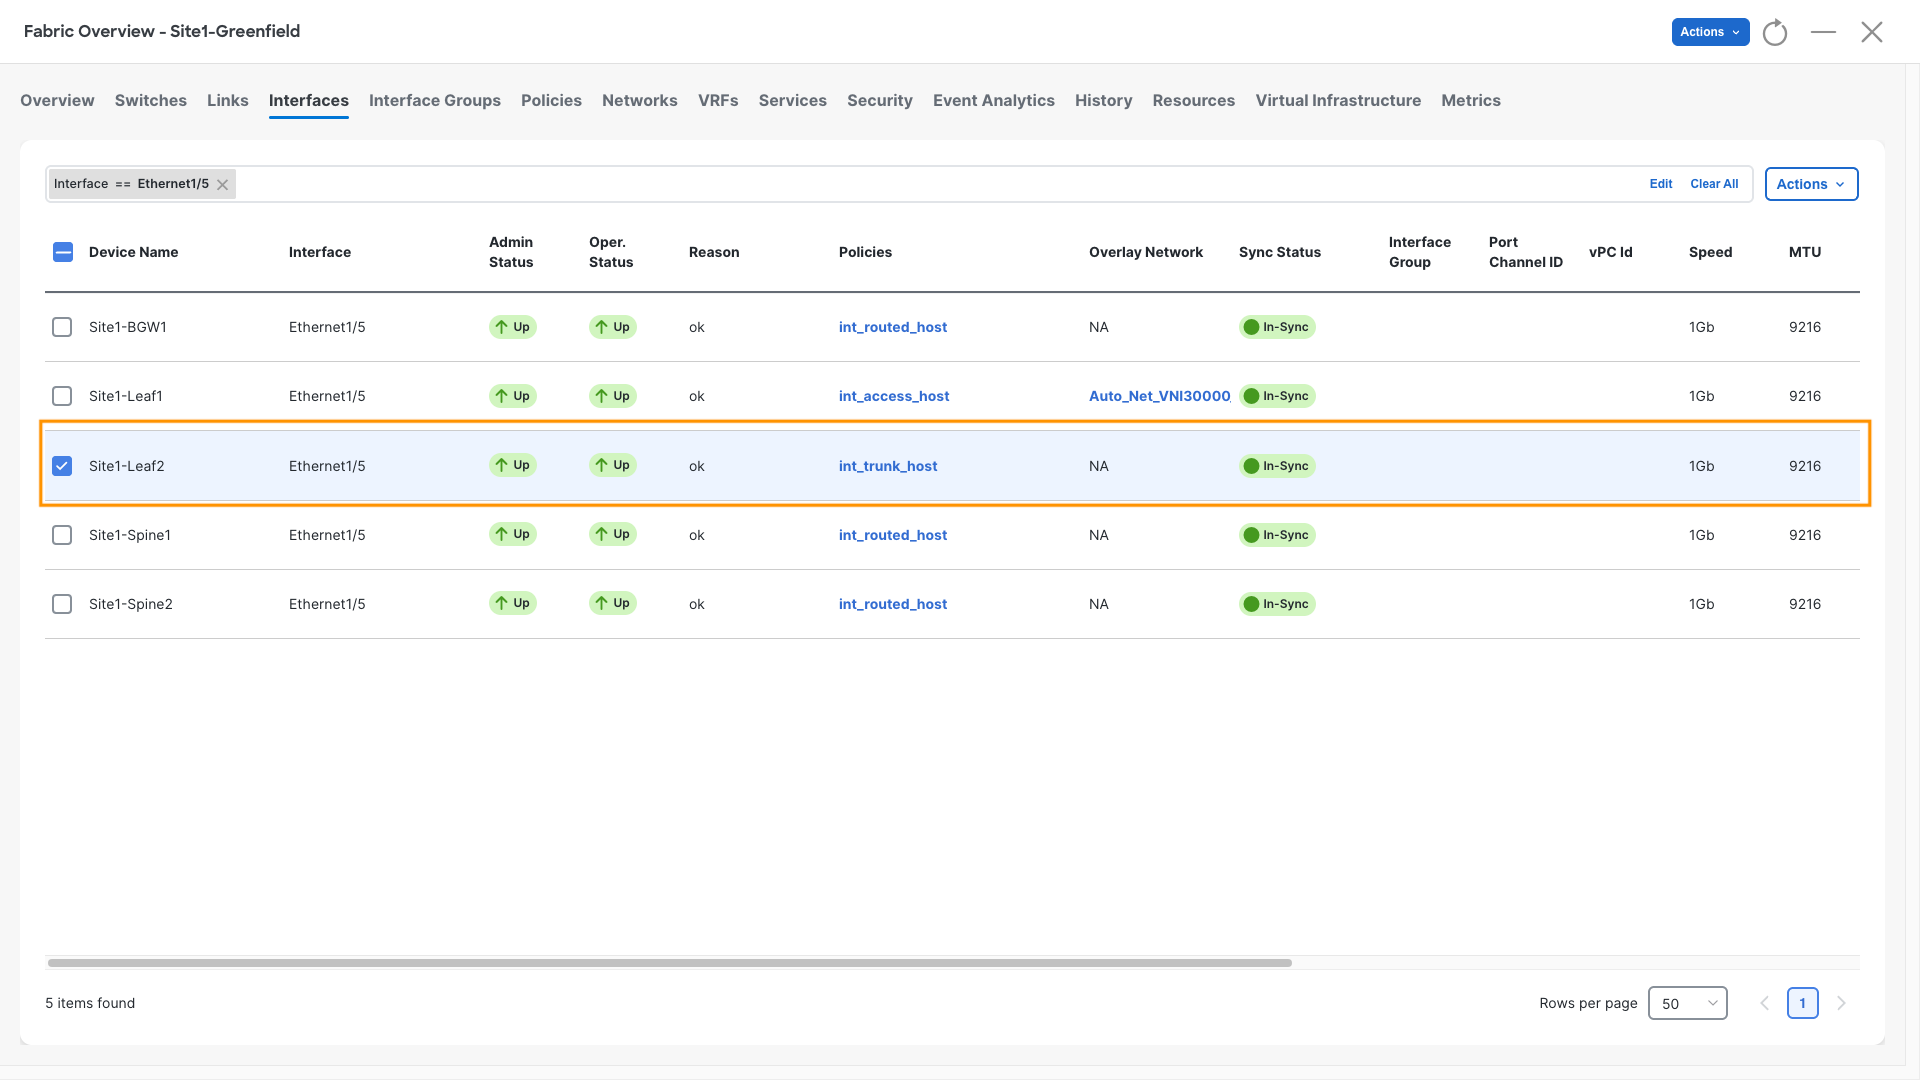
Step 5: Edit Interface for Data Connectivity
- On the Fabric Overview page, click the Interfaces tab.
- In the filter field, enter `interface == Ethernet1/5`.
-
Check the box next to Site1-Leaf2, then click Actions > Edit.
Step 6: Configure the Interface
- Policy: `epl_routed_intf`
- Interface IP: `198.18.4.99`
- IP Netmask Length: `24`
-
Click Save, Deploy, and Deploy Config.
Note
We are adding this interface to OSPF so it announces the spine loopbacks out of Ethernet 1/5.
There is a device in the dCloud topology that relies on this information to correctly forward traffic.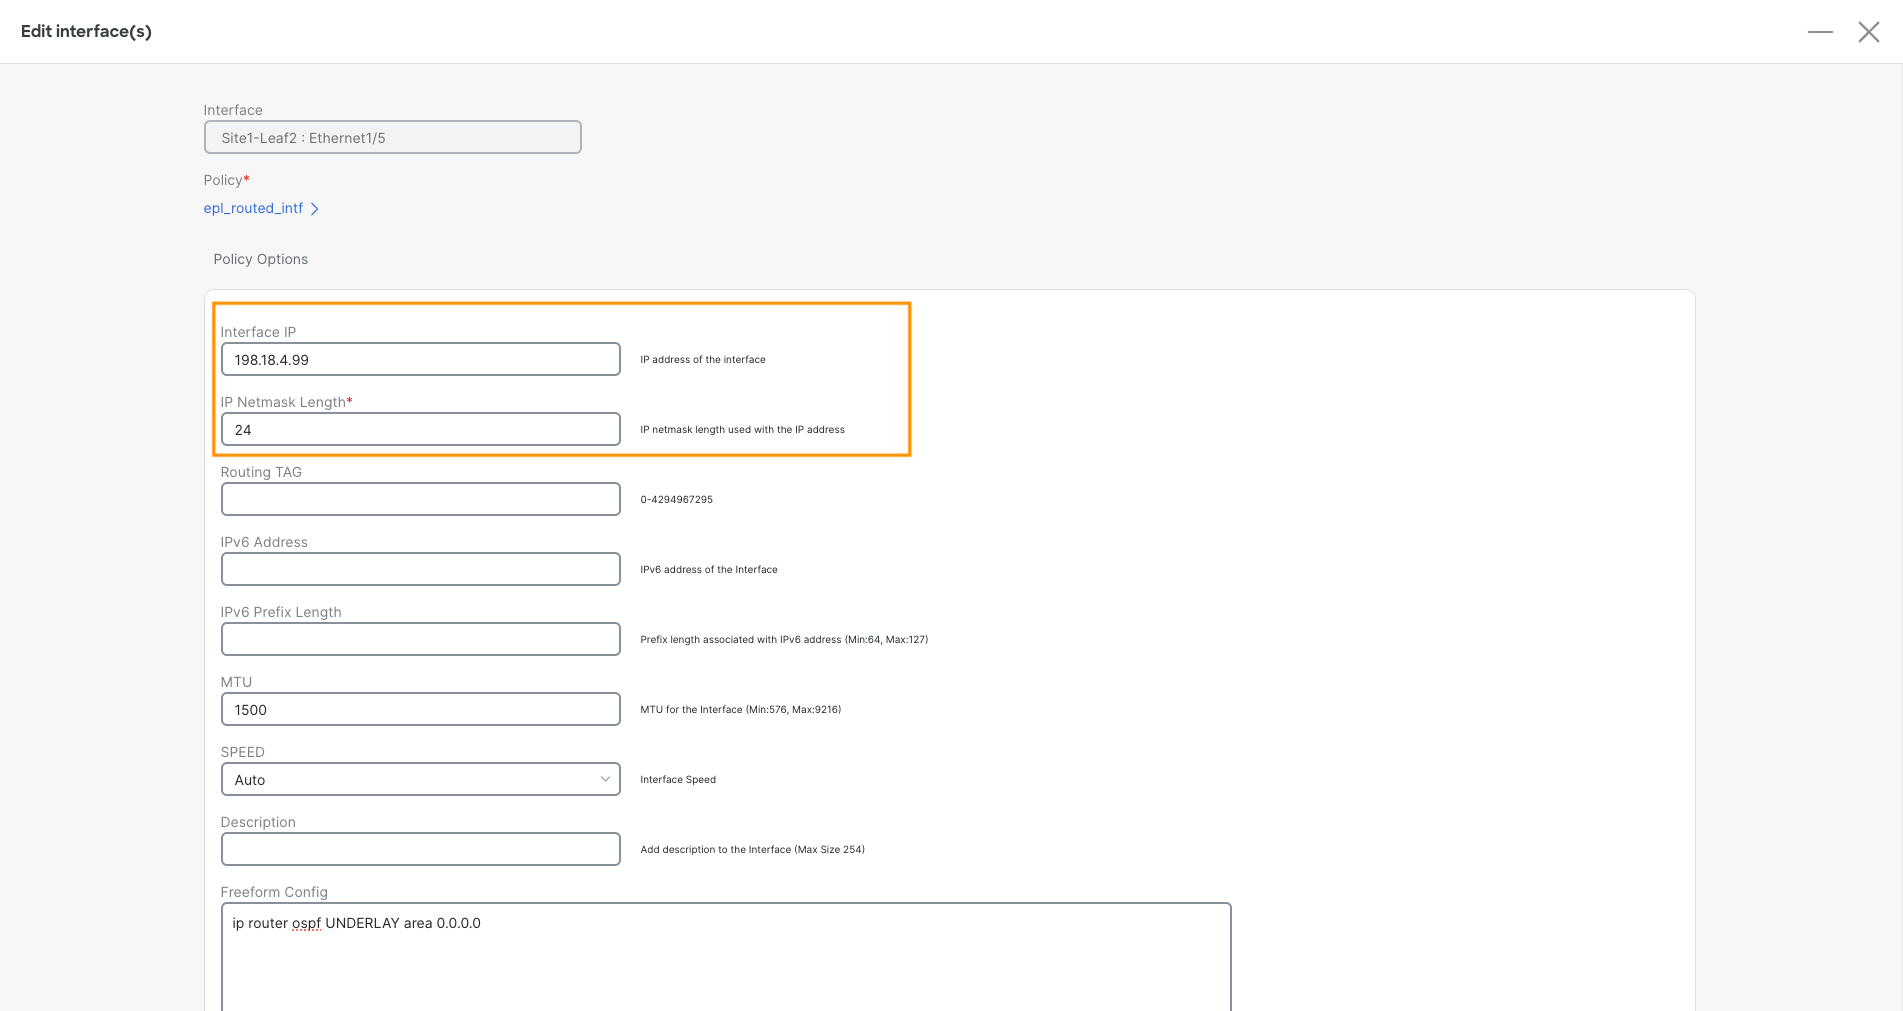
Step 7: Verify Reachability to NDFC’s Data Interface
-
From Site1-Spine1, verify you can reach `198.18.4.230` (ND’s Data interface) from the Underlay Loopback0:
Site1-Spine1
ping 198.18.4.230 source-interface loopback0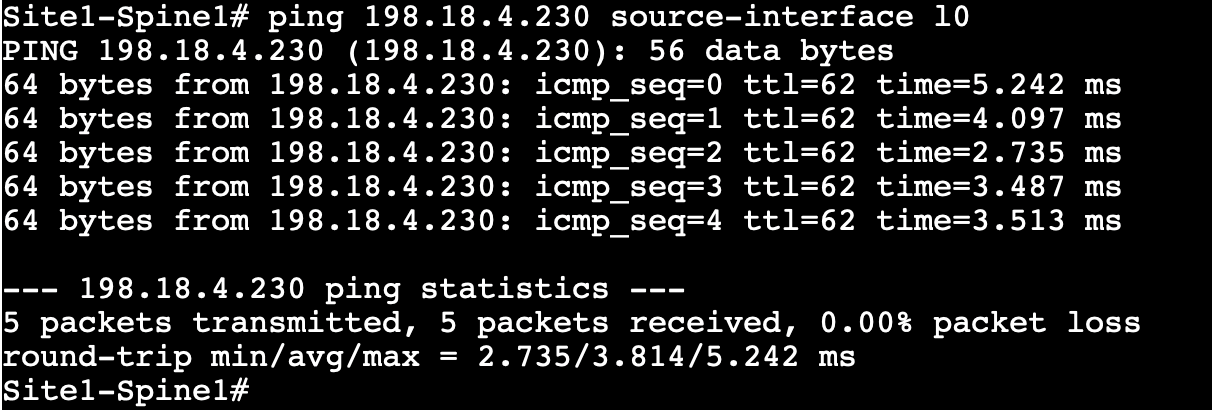
Note
A successful ping confirms that NDFC’s Data interface can reach the Fabric’s Underlay Routing Loopbacks.
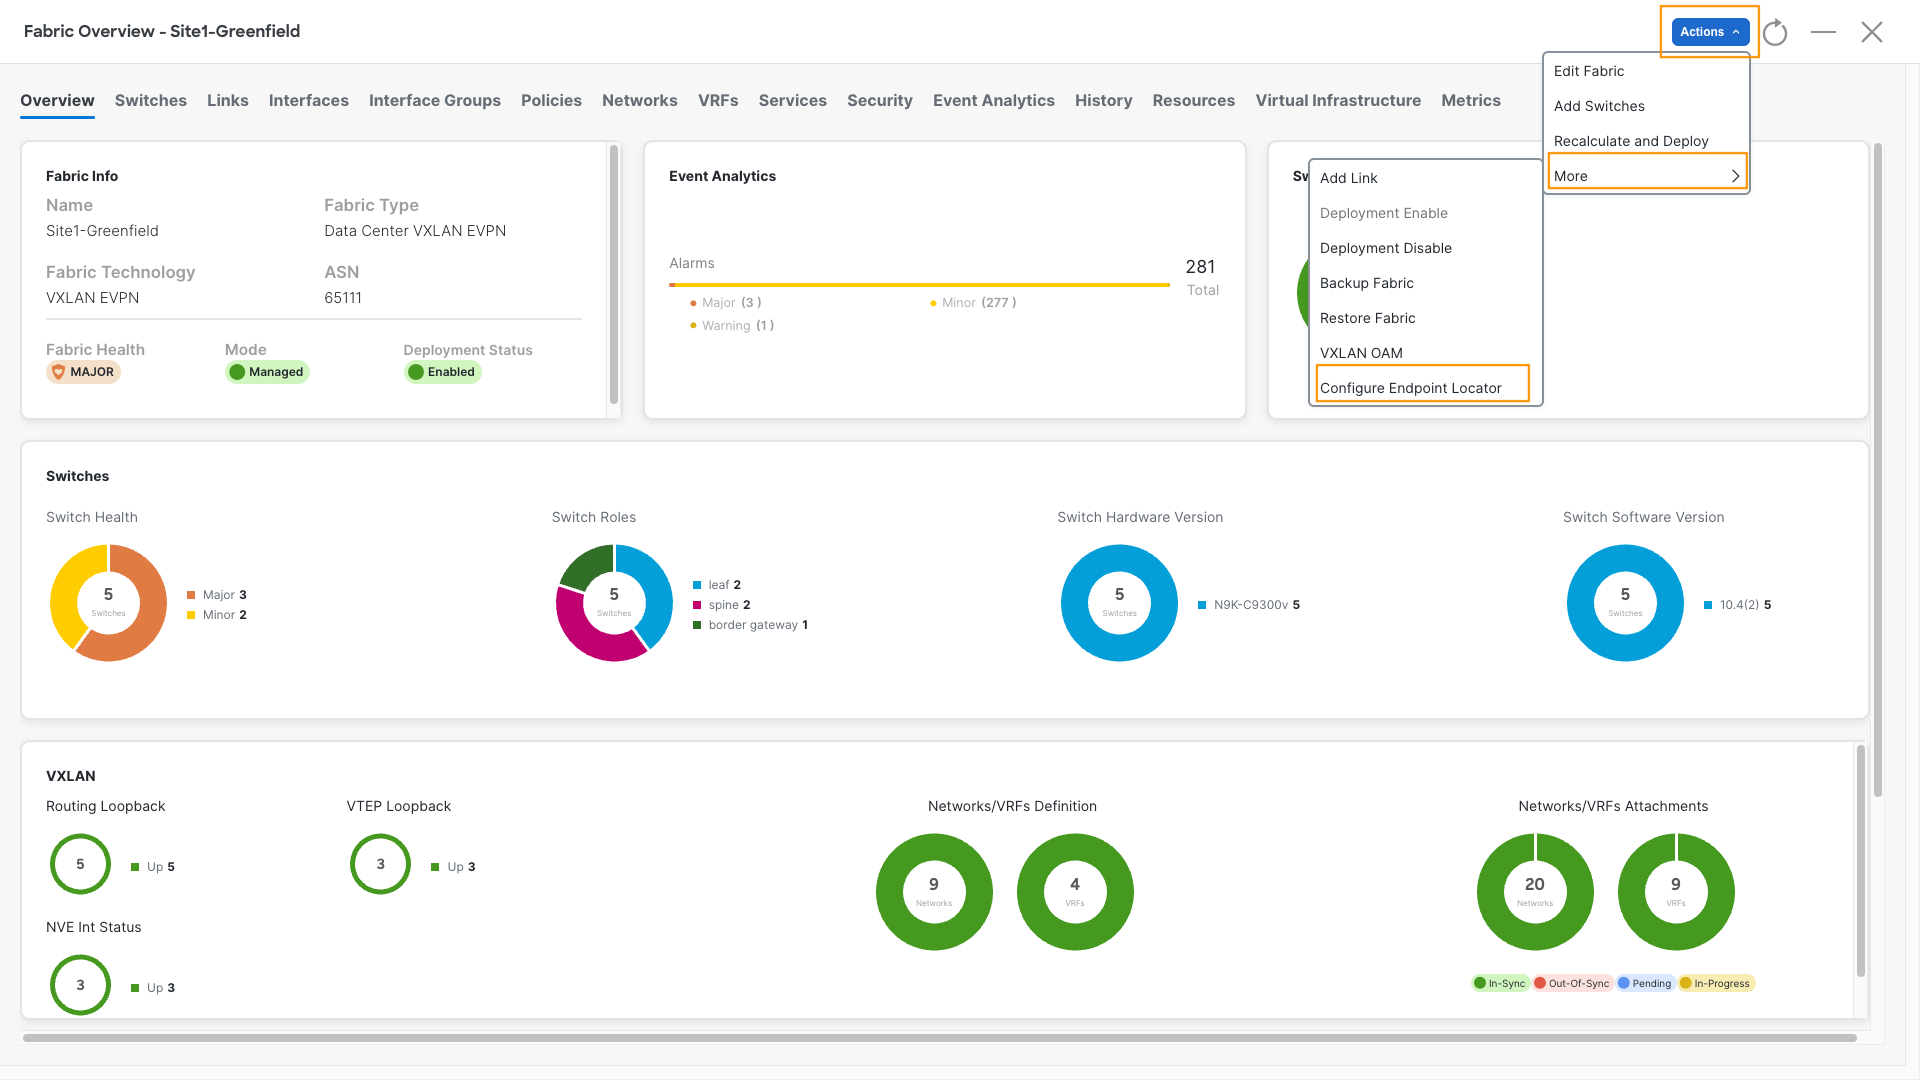
Step 8: Configure Endpoint Locator in NDFC
- Return to the Fabric Overview page.
-
Click Actions, More, then Configure Endpoint Locator.
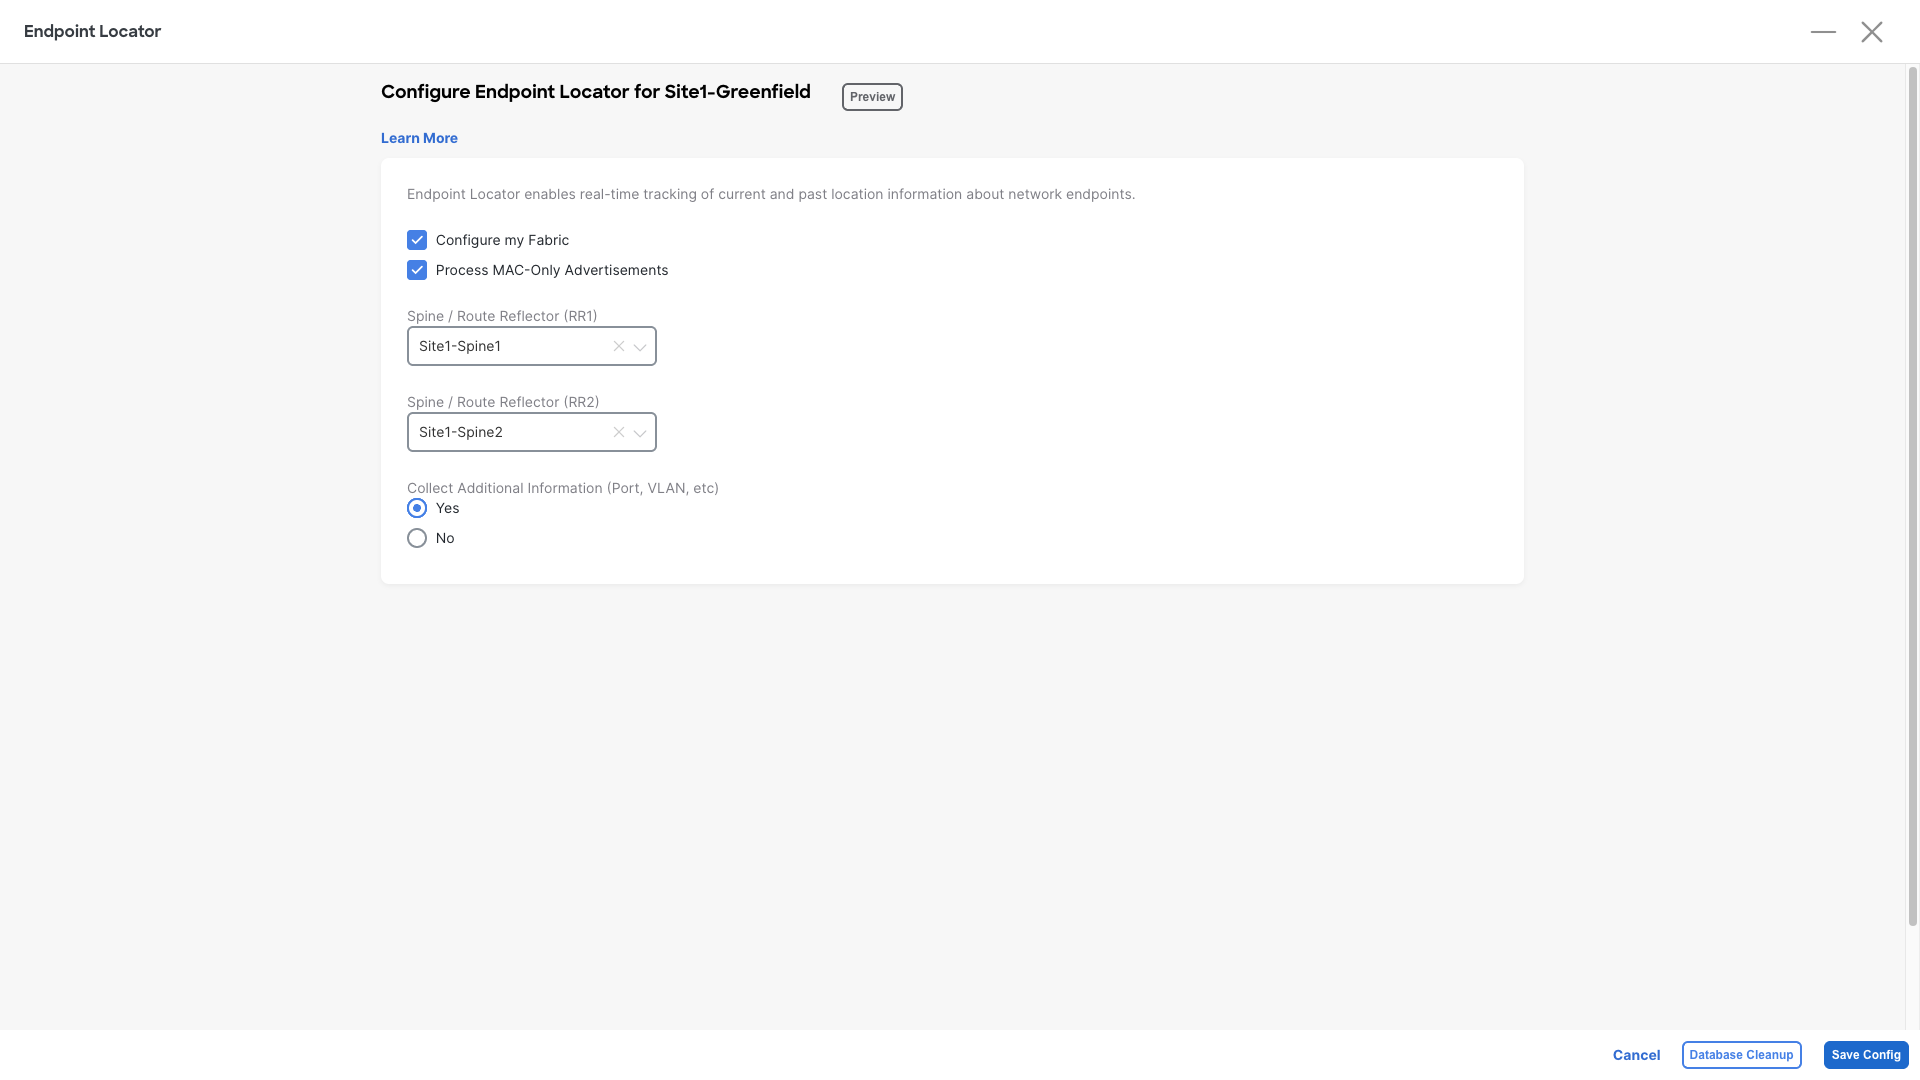
Step 9: EPL Settings
- Check Configure My Fabric
- Check Process MAC-Only Advertisements
- Spine/Route Reflector (RR1): `Site1-Spine1`
- Spine/Route Reflector (RR2): `Site1-Spine2`
- Collect additional information (port, VLAN, etc): `Yes`
-
Click Save Config
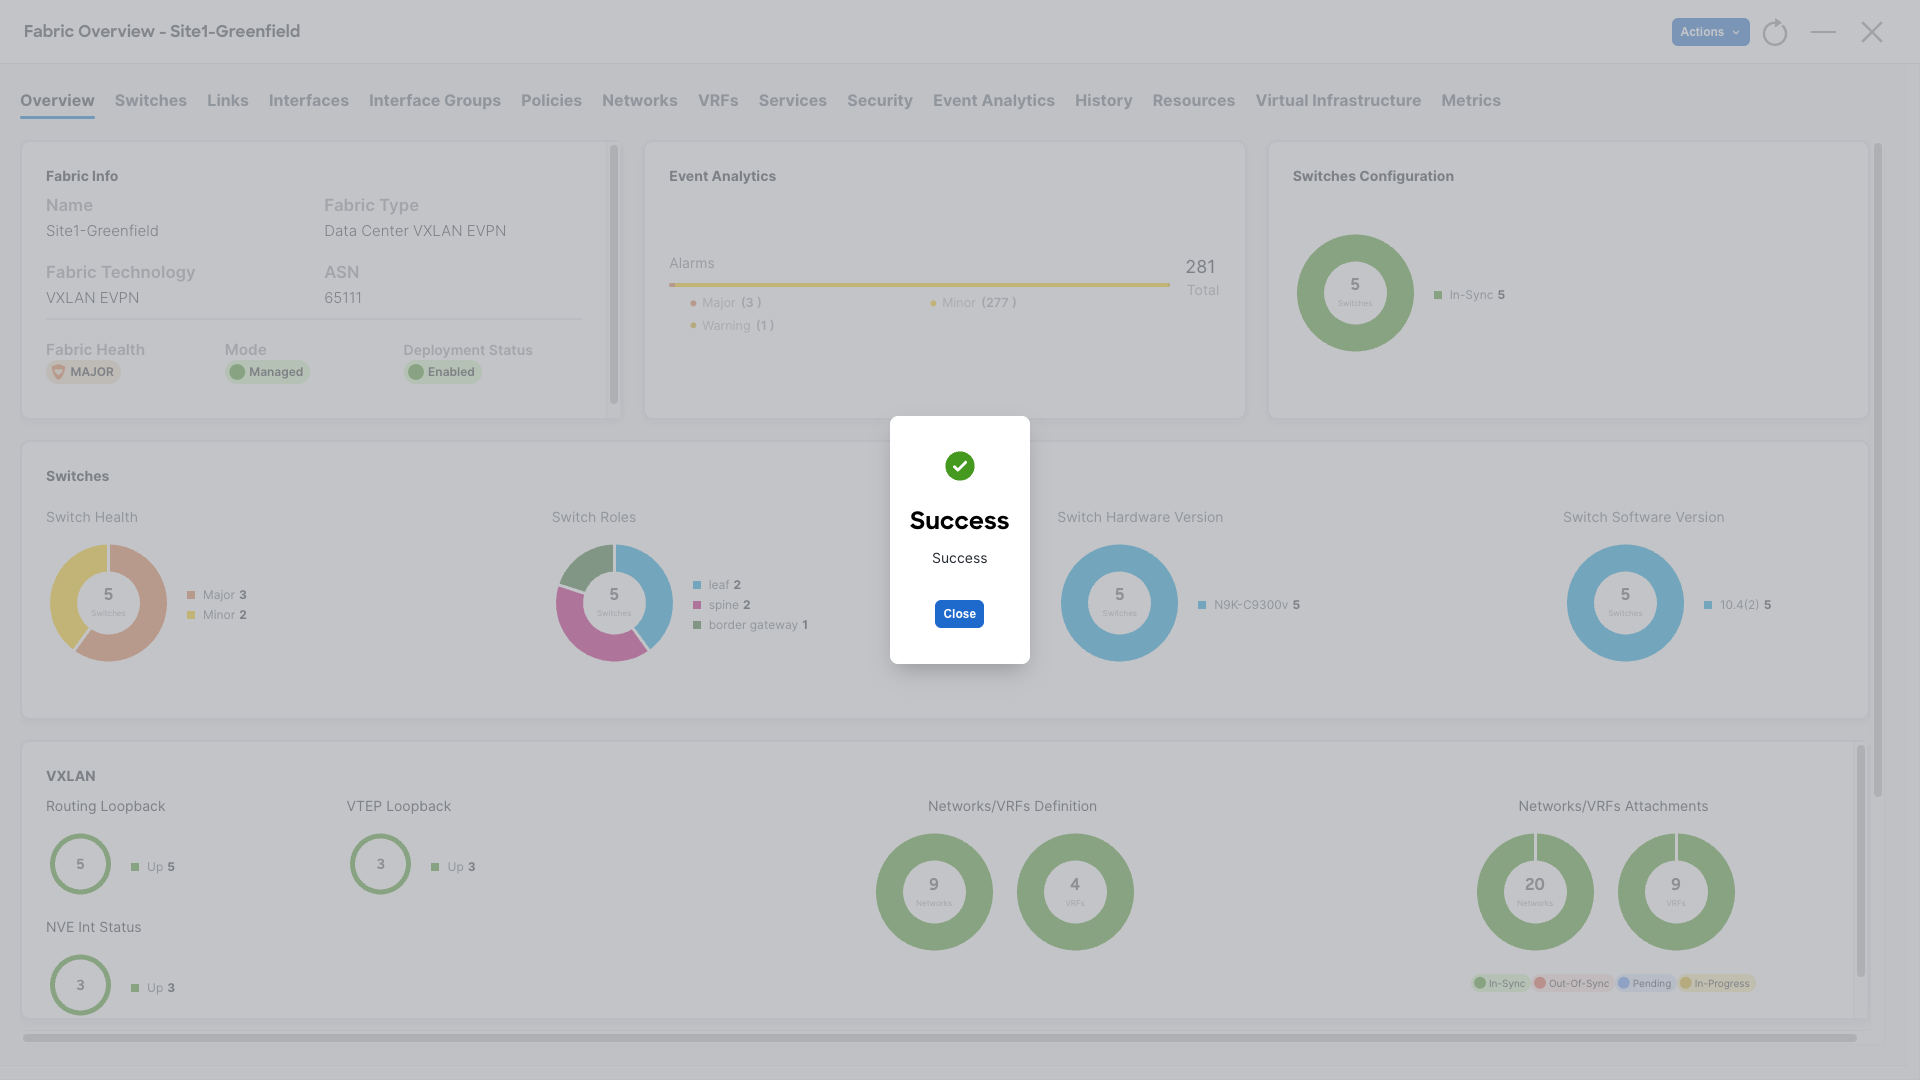
Step 10: EPL Configuration Success
- Wait for the success dialog to appear once EPL is configured, this might take 2-3 minutes.
-
Click Close on the success dialog.
Step 11: Verifying the Configuration
-
From the CLI of Site1-Spine1 or Site1-Spine2, verify BGP peering with NDFC for L2VPN EVPN:
Site1-Spine1
show bgp l2vpn evpn summary
-
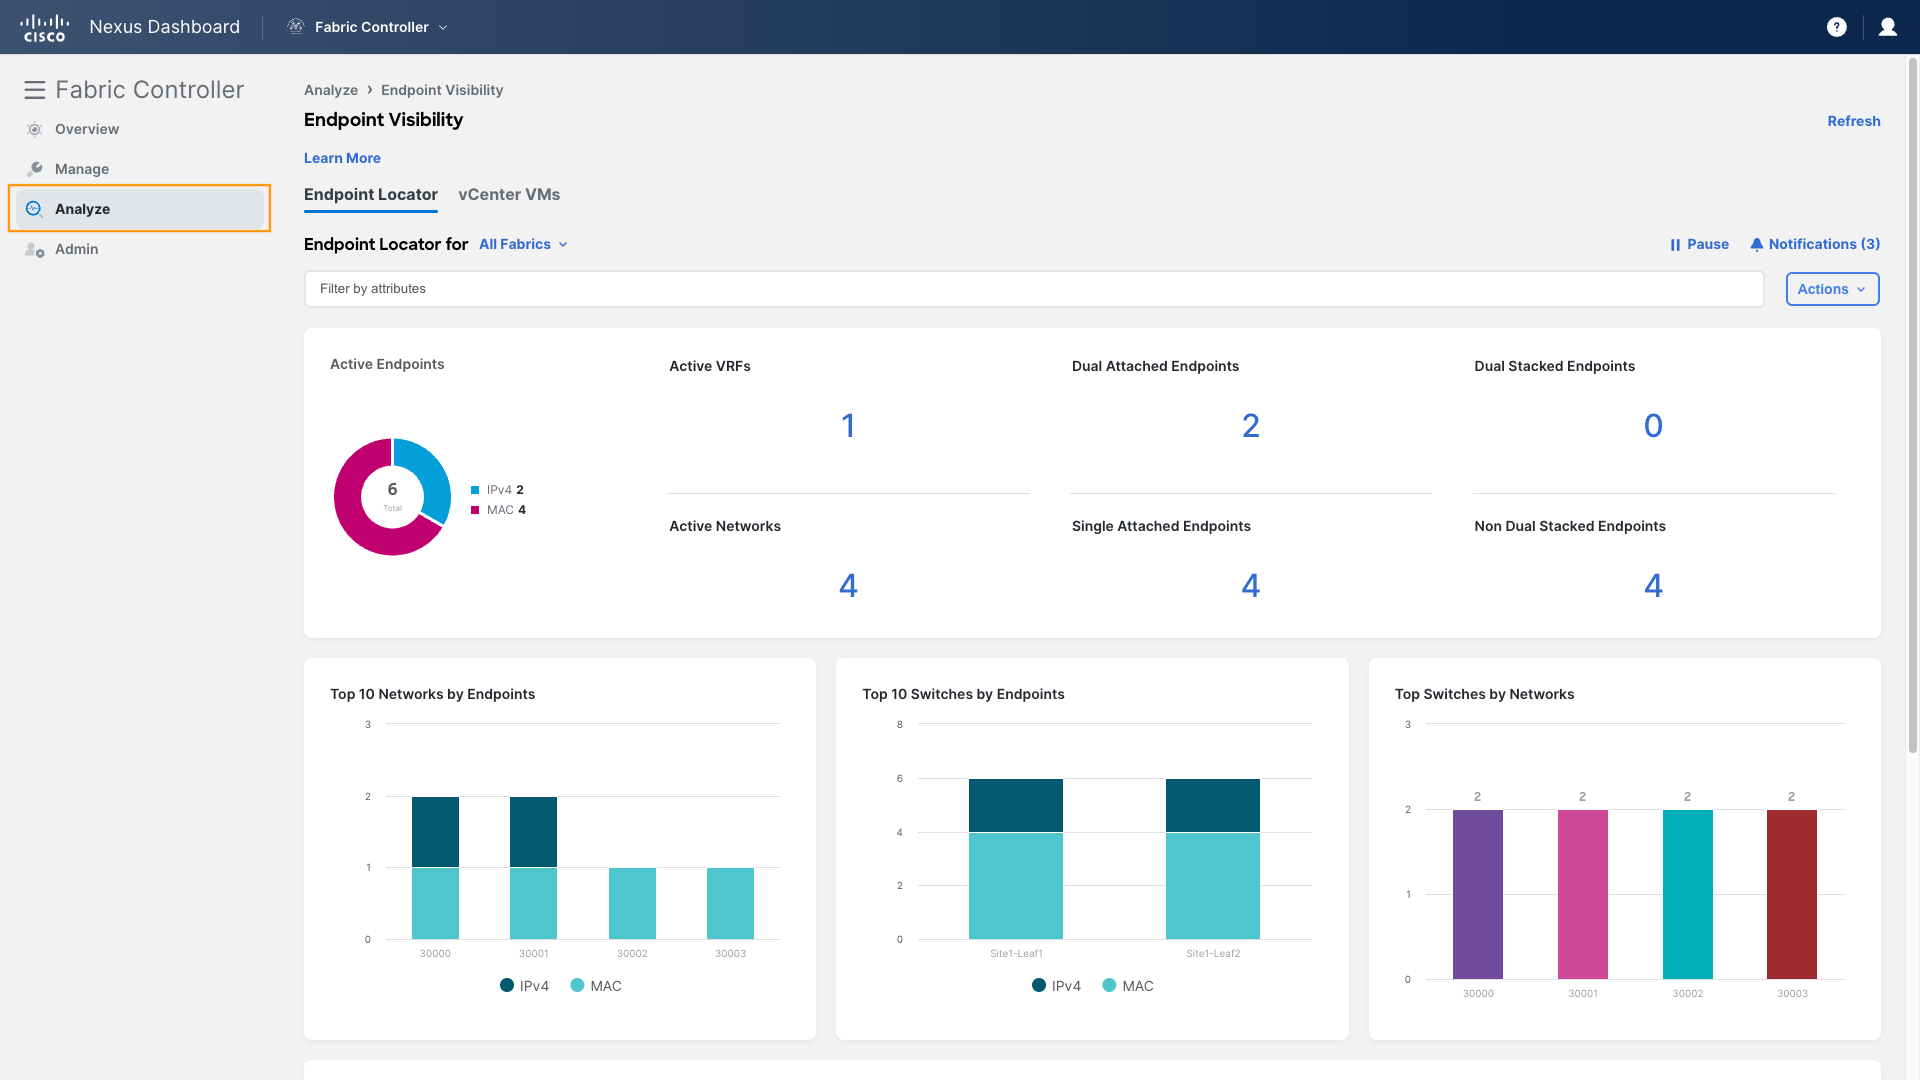
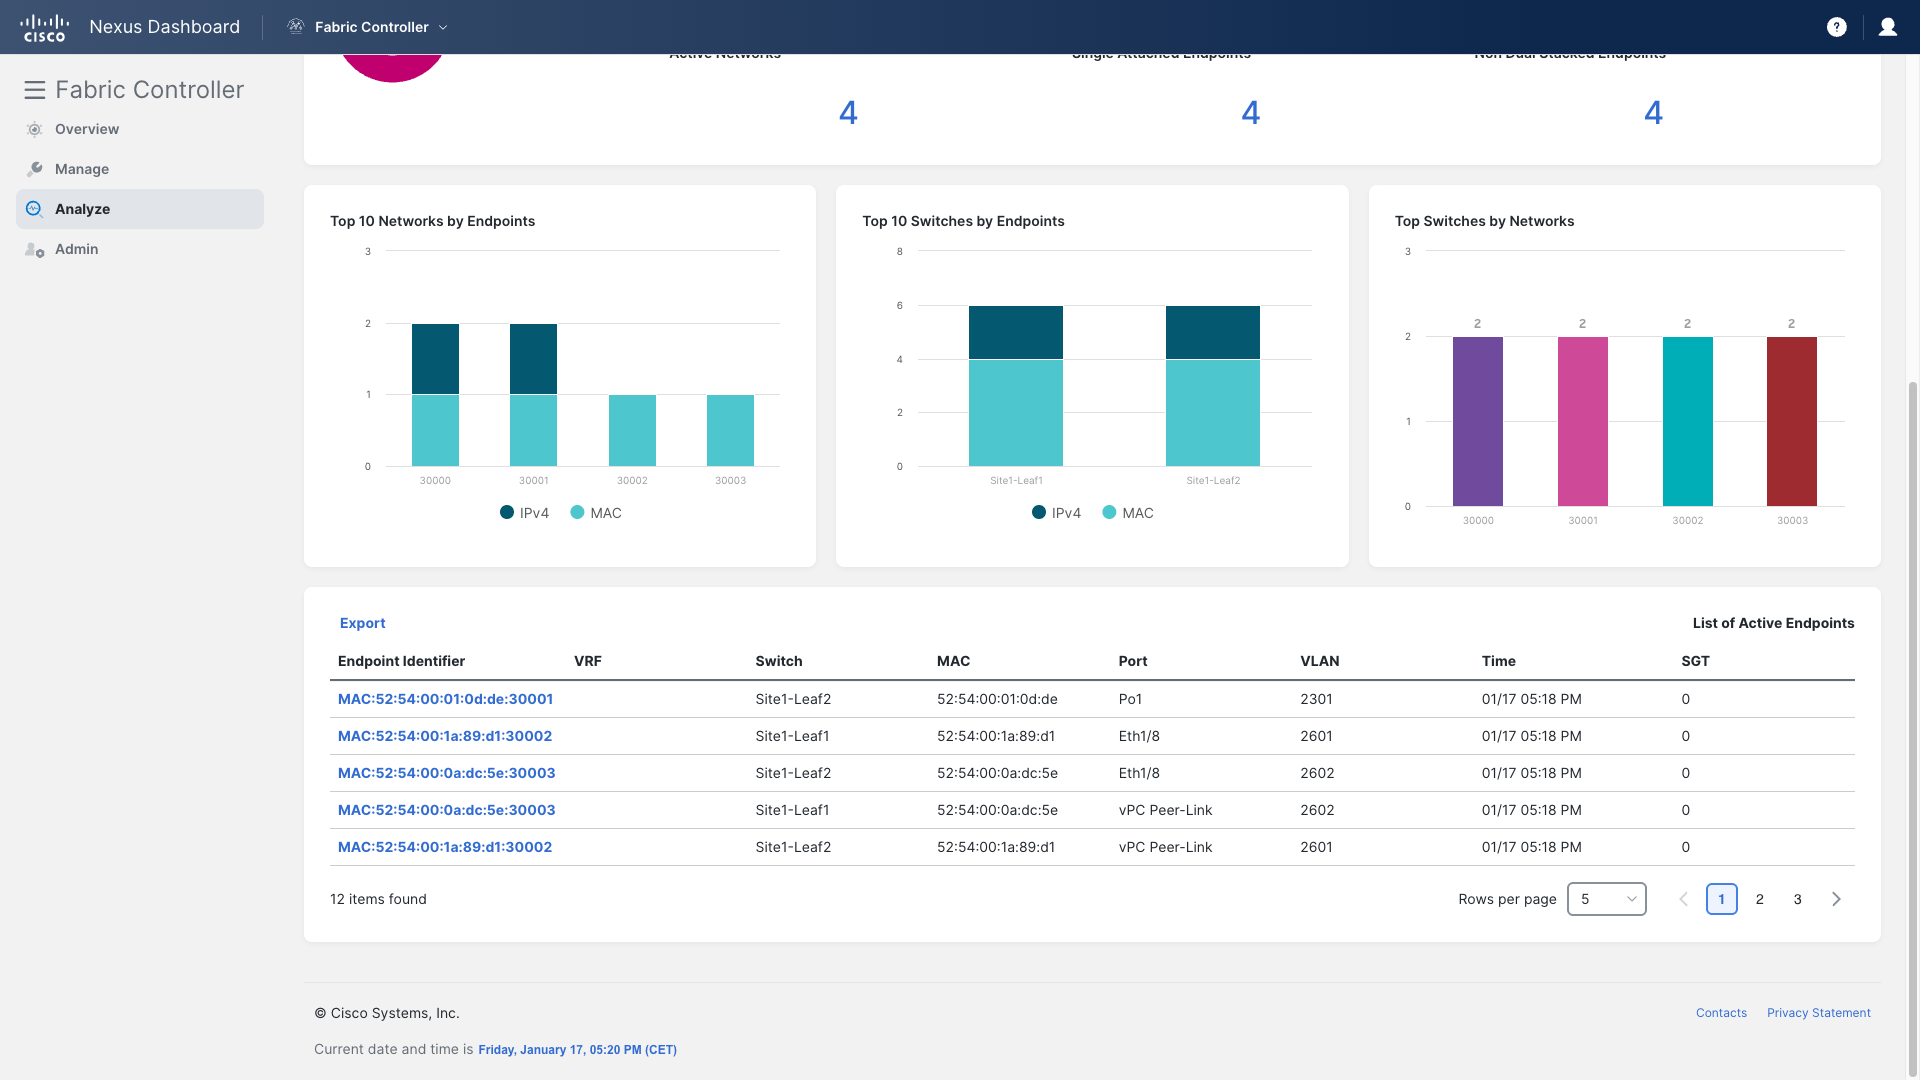
In NDFC’s Analyze menu, click Endpoint Visibility to see endpoint details.
Note
Within a few minutes, Endpoint Locator populates the Endpoint Activity screen for newly configured hosts. Two endpoints:—Server-1 (192.168.11.101) and Server-2 (192.168.12.101) will show up in the EPL dashboard (both are on Site1-Leaf1 and Site1-Leaf2, respectively).
If both endpoints are not visible, ping Server2 from Server1. -
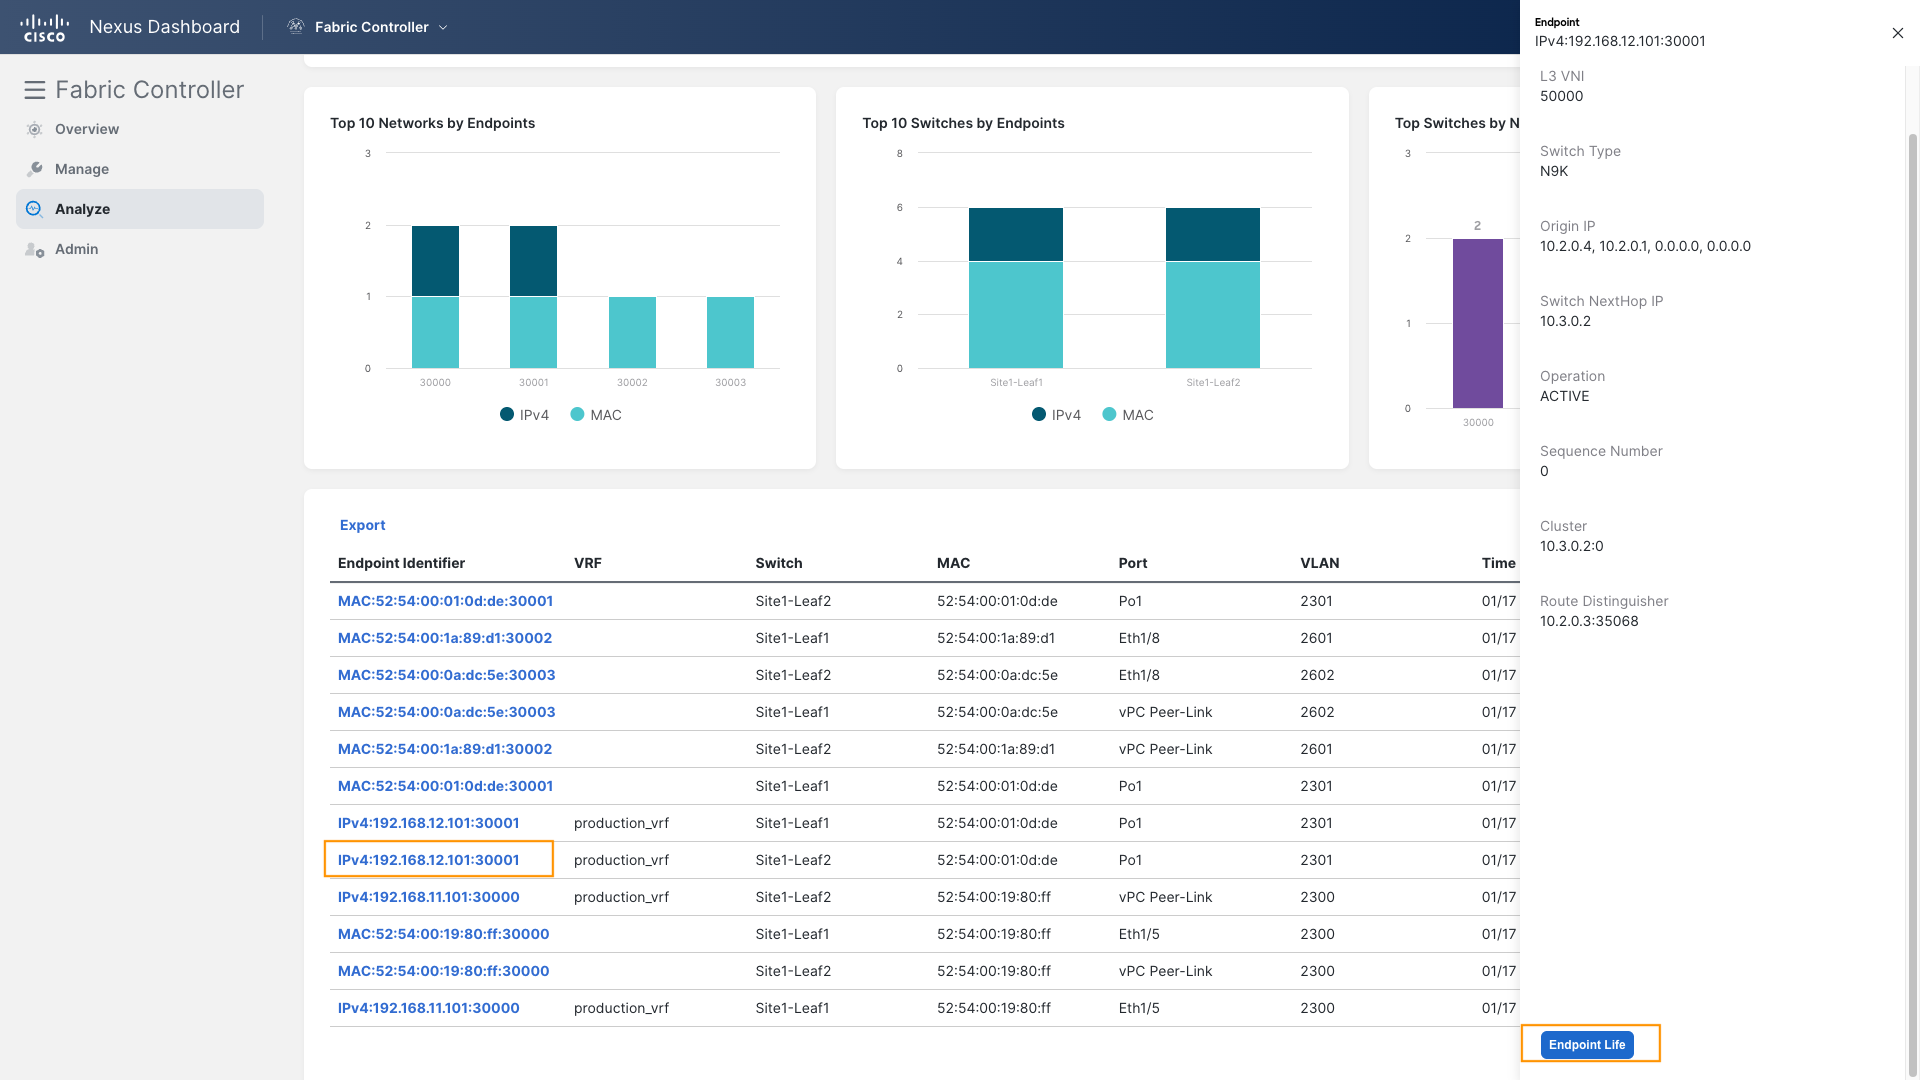
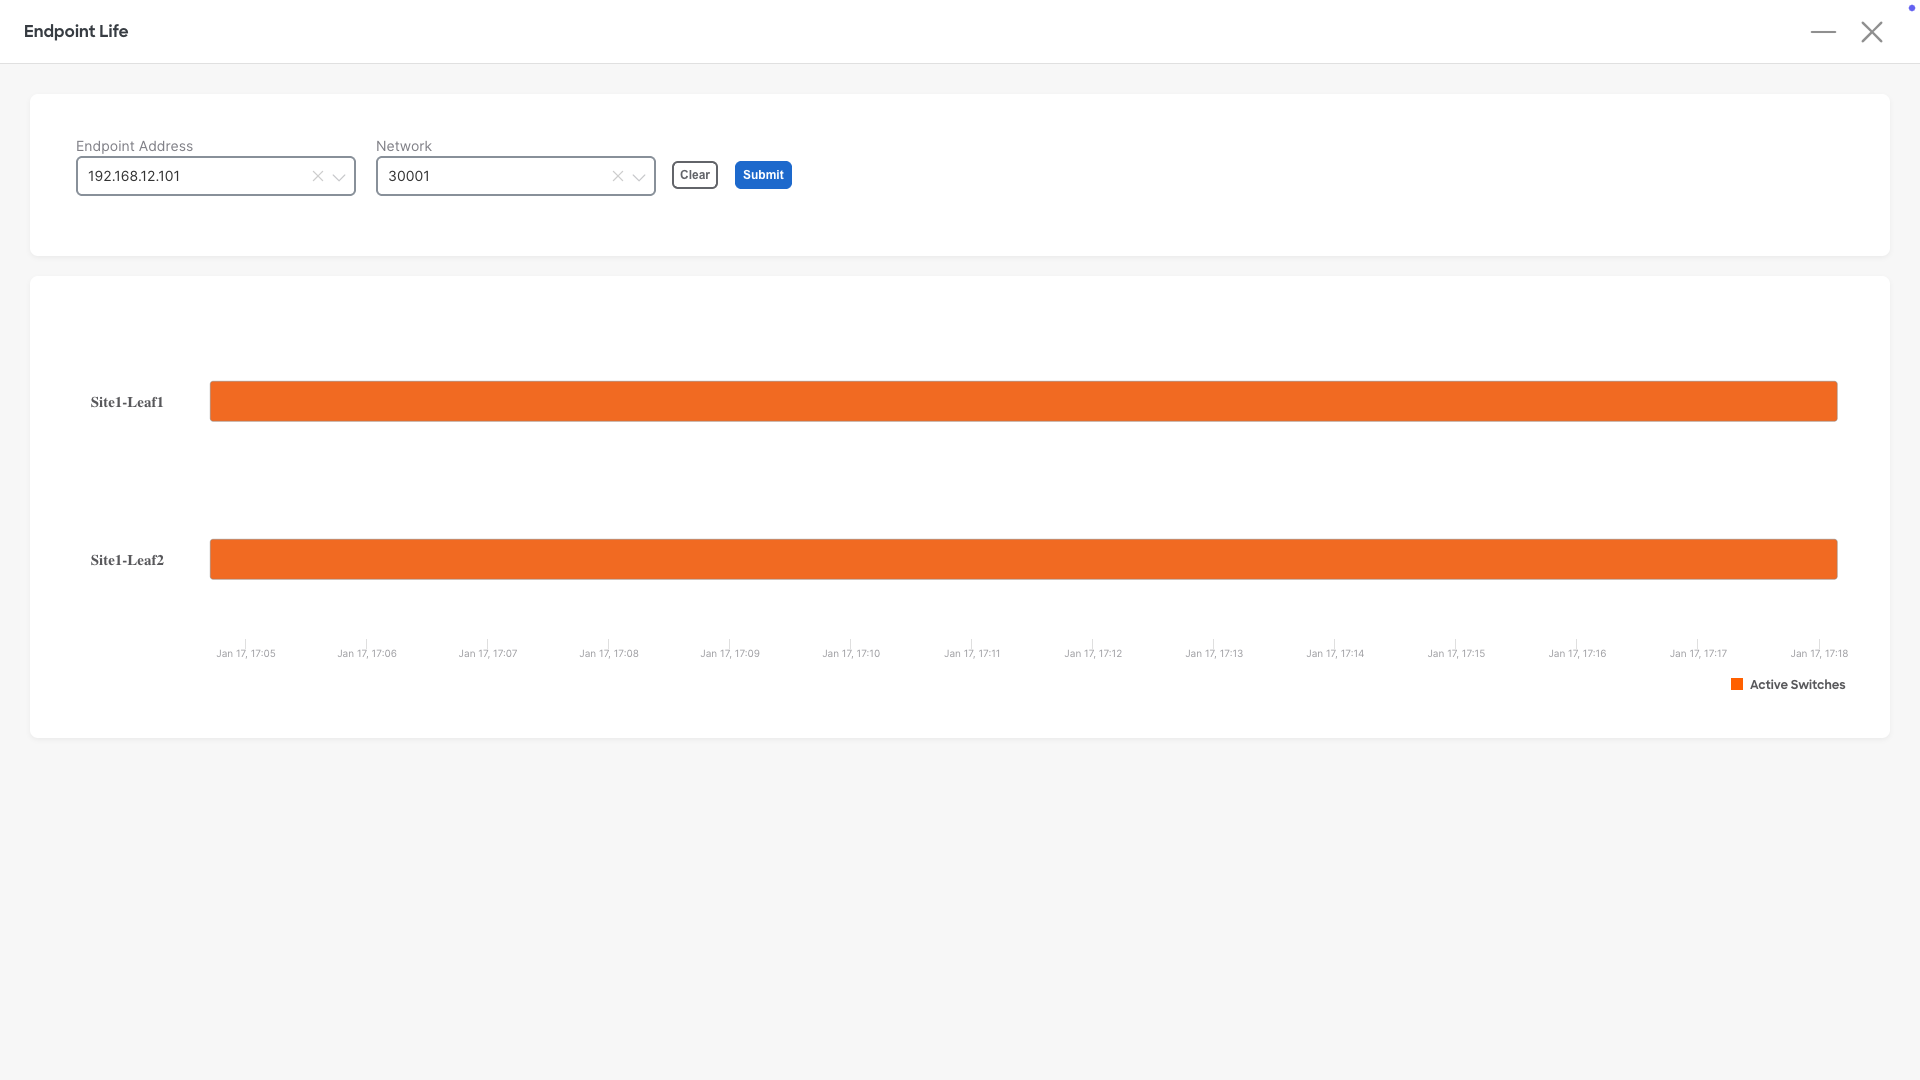
To get the endpoint life information, click on the endpoint, scroll down, and click Endpoint Life, this, in a real scenario will track the endpoint move history, very convenient!
You can continue now with Task #7: Service Device Insertion EOF